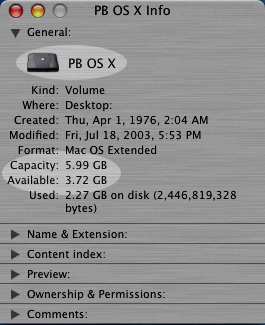
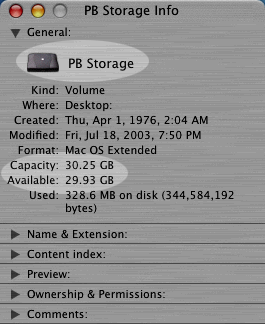
If you have a Beige G3, Wallstreet Powerbook or an original iMac with a hard drive larger than 8GB, you will have run across an interesting problem if you've tried to install OS X on it. Specifically, there is an unusual restriction on these machines, requiring you to repartition your hard drive so that the partition that you are installing OS X into is a.) the first partition on the hard drive and b.) smaller than 8GB.
So, depending on the size drive you installed, and your preferred
partitioning sceme, you will likely wind up with drives looking something
like this:
As you can see, there's a lot of space on that "extra" partition that is going to waste...
At first this doesn't sound so bad. OS X doesn't take up all that much space, but once you start adding applications, and one or more Users worth of pictures, Quicktime Movies, mp3s, and other documents, you'll soon start feeling the pinch. Sure, you can assign all your applications to save to folders on the remaining partition, but that has to be done with each user, and each application. Not only is it time-consuming, its not really "natural" feeling - and not very Mac-like.
I found myself in just such a situation with my Wallstreet PowerBook after
I added a 40GB drive to it. I figured there had to be a way to utilize the space on the "leftover" partition in a more transparent fashion. I remembered a trick that allowed a user to share the desktop folder between OS X and OS9 by use of aliases. If that was possible, surely it could be done with the rest of the folders! After much trial and error (and, of course, careful backing up of my system) I was able to distill the process down to something that did what I wanted to and did it well. Here is the result of that distillation:
Step 1.) Choose the account that you would like to move to the larger
partition.
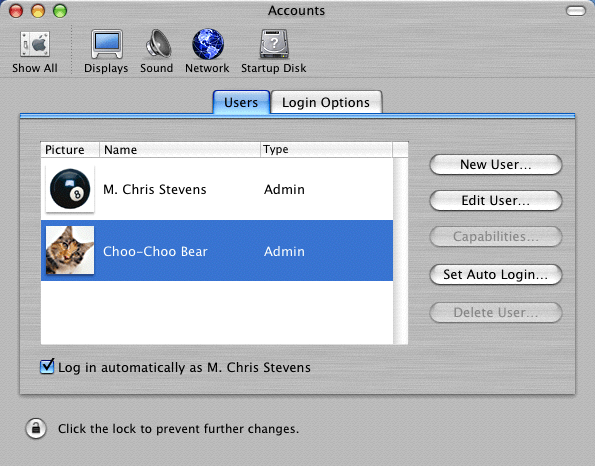
For our example, we're going to switch over the folder for Choo-Choo Bear.
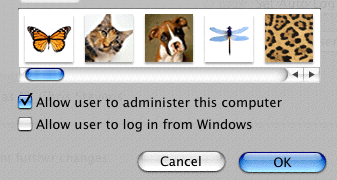
To aid in assigning permissions later, you should grant the user you're changing Administrator access. While logged in via a current Administrator account, highlight the user in the Accounts preference pane (as above) and click Edit. Check the "Allow user to administer this computer" button and click OK.
Step 2.) Make a backup or two of the files you are going to move.
As always, when moving around files, its always a good idea to make backups
of the irreplaceable ones. A good backup will save a lot of heartache
should something go awry.
Step 3.) Boot into OS 9.
As this process involves the moving around of various files and folders used by OS X, you either have to boot into 9 or log in as root. Since booting into OS 9 has less potential for causing some rather nasty damage if you are not careful, I went with that option. If you're one of the few who took OS 9 off your machine completely when you switched to X, you can always do this while booted from an OS 9 CD.
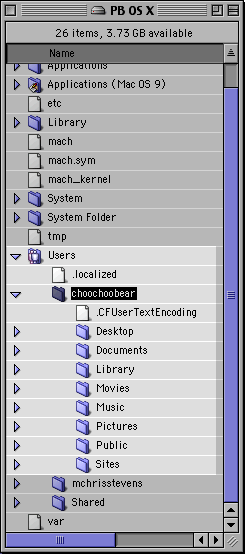
Step 4.) Find the folder for the account you want switched over.
It will be located in the Users folder on the drive you boot into OS X from. In the example below, the OS X boot drive is named "PB OS X" and the account I want to switch is called "choochoobear"
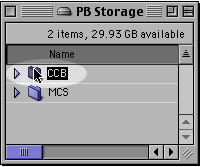
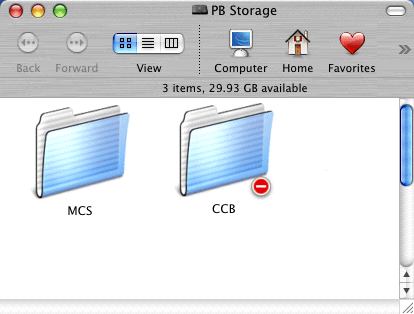
Step 5.) Create a folder on the "extra" partition for the data you are going to move over.
For ease of organization, I recommend a similar name as your original users
file.
In the example above, I have named the new folder "CCB"
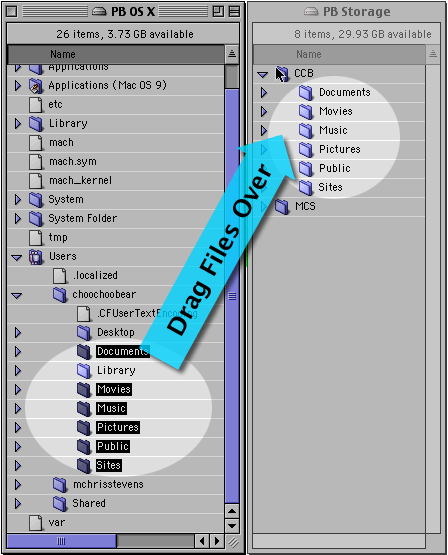
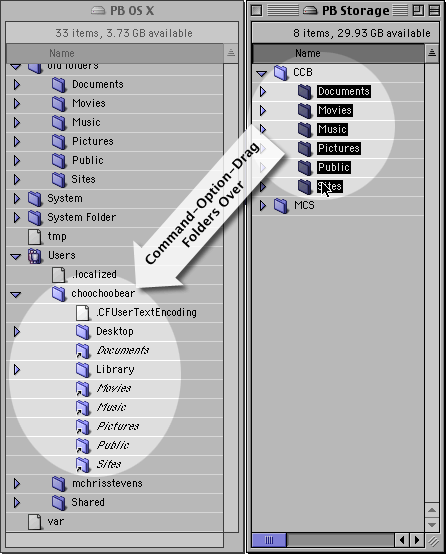
Step 6.) Copy over the data to the new folder.
Copy the following folders from your user folder to the new one you just
created: Documents, Movies, Music, Pictures, Public, Shared, and Sites.
The easiest way to copy them to the new partition is to simply drag them over.
Since you are switching partitoins, copies will be made rather than moving
the originals.
(NOTE: While it is also possible to put the Desktop folder on the "extra" partition, this is not recommended, as it can cause problems with some applications - such as Software Update - when saving files to the Desktop)
Step 7.) Move your old data folders.
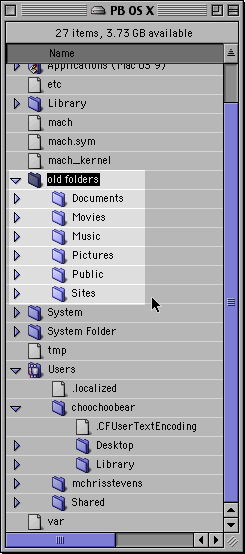
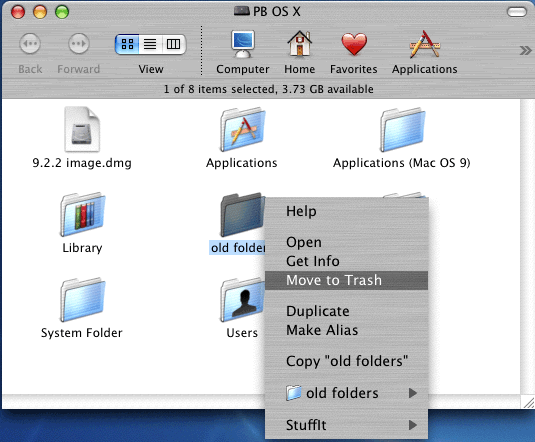
Once the appropriate folders have been copied over, move the original
folders in the user folder to another folder elsewhere on the hard drive.
In the example above, I created a folder called "old folders" on the root level of the hard drive and moved them there.
Step 8.) Create Aliases of the folders on the "extra" partition and put them in the user's folder.
The easiest way to do this is to select all the folders and drag them to
the user folder, holding down the command and option keys as you do so.
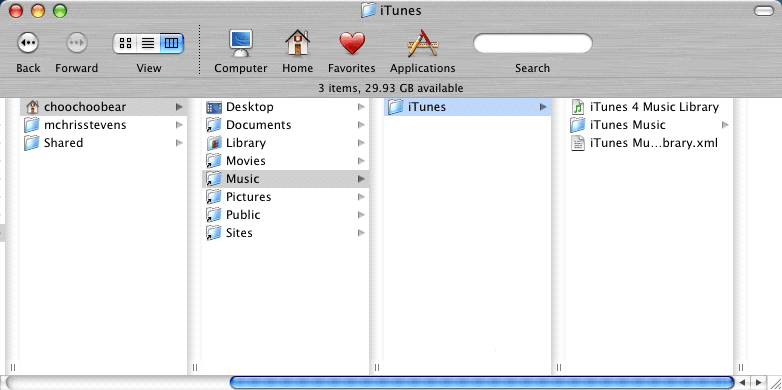
Step 9.) Boot back into OS X and verify that you are able to access the
data in each of your moved folders.
The home folder sees the aliases and follows the data path just like
regular folders. You will notice that on these folders, the regular Home
folder icons have been changed to a generic folder alias icon. You lose the
pretty icons, but you gain considerable functionality in return. Seems like
an even trade.
Step 10.) Get rid of the old data folders.
Once you have verified that all the data is accessible, you can then delete
the temporary folder containing the original folders.
Step 11.) Make it more secure.
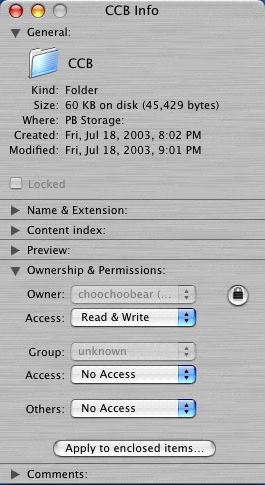
For added security, you can select your newly-made data folder, Get Info on
it, and set the Ownership and permission settings to resemble those below.
Once they are set, click the "Apply to enclosed items" button and agree to the dialog that pops up. Now, other users using the same machine with different accounts will not be able to access this folder.
However, this is not completely secure, as any user with Administrator privileges can change ownership and permissions. The best way around that is to limit those users on your machine with Administrator access. (You can turn off Administration privileges by unchecking the "Allow user to administer this computer" box that you checked in Step 1.


 1-800-275-4576