Upgrading your AppleTV's Hard Drive
by Jamie Dresser
|
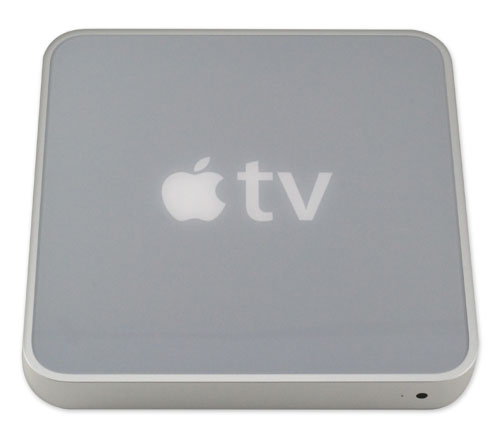
If you were an early adopter of the AppleTV, you probably are already feeling the pinch of only having 40GB of space on the built-in internal hard drive. Don't let that bother you - you can upgrade the drive inside all the way up to a 250GB!
NOTE: This is, unfortunately, not a "cheap" upgrade, since it requires software, and hardware, to perform. There are other methods available online that you can follow that use tools built into the Mac OS to do this, but be warned - they are not easy and are not simple. Some of the websites you can read these methods on are appletvhacks.net and awkwardtv.com - both are very helpful.
Items needed:
|
| Procedure: |
|
Begin by making sure you have everything backed up on your AppleTV.
This procedure will require you to transfer everything from your iTunes library that you want on your AppleTV BACK onto it. |
|
| Flip the AppleTV over onto it's top. Be sure to use a soft cloth to protect the top from any scratches. |
|
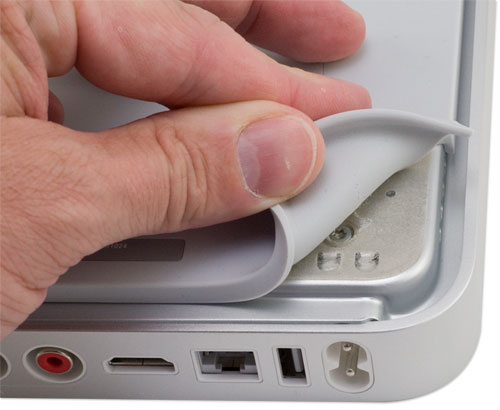
Peel the rubber bottom foot off of the AppleTV. Go slowly, and be careful, or you will rip the foot.
If you rip the foot, it will still go back in place, it just will be less attractive to anyone looking at the bottom. But of course that's purlely cosmetic.
|
|
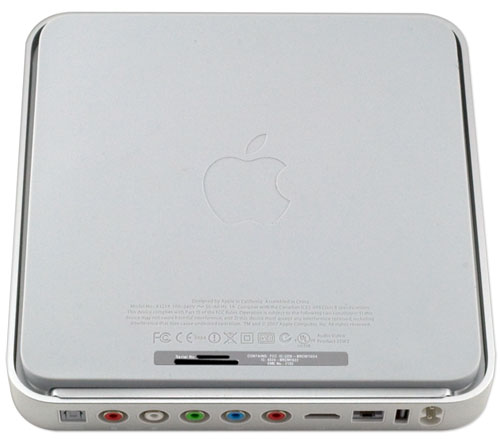
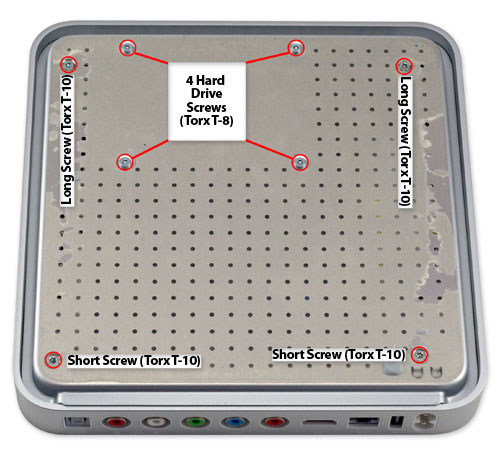
Once you have the rubber foot removed from the AppleTV, you have 8 screws to remove. 4 are Torx T8, and 4 are Torx T-10. With the AppleTV's ports facing you, remove the 2 short Torx T-10 screws from the holes closest to the ports, then the 2 long Torx T-10 screws from the front side of the Apple TV. Finally, remove the 4 Torx T-8 screws that hold the hard drive in. They are all the same size, short.
Before proceeding further, make sure to ground yourself and observe static-safe precautions since you are now going inside of the AppleTV. |
|
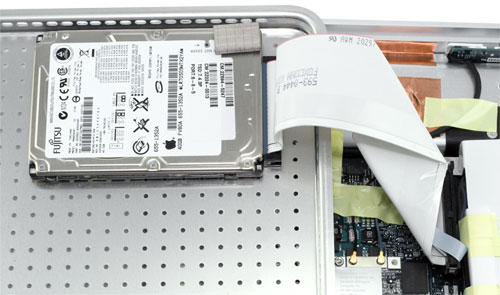
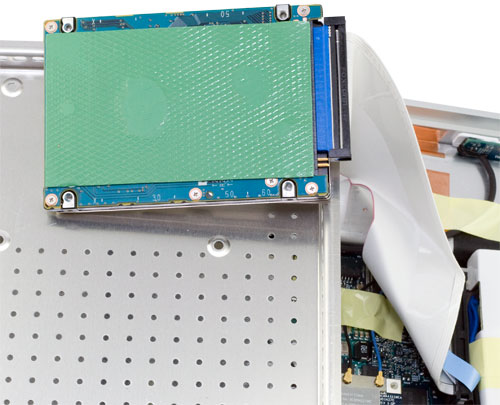
Now that the screws are removed, you can take the bottom off of the AppleTV. There is a ribbon cable going to the hard drive that is attached to the bottom of the AppleTV - you have enough room in the cable to flip it over and set it on the AppleTV as shown. In this picture, the ports are still facing towards you - don't put too much strain on the cables just to be safe.
Step1:
Remove the sliver anti-static block from the top right of the hard drive - you need to put it on the new drive you install.
Step 2:
Lift up on the corner of the hard drive, either side, and gently peel it away from the bottom cover of the AppleTV |
|
Step 3:
Remove the ATA cable from the hard drive by pulling it gently to the right, away from the hard drive.
Step 4:
Peel the green sticky pad from the bottom of the hard drive. You will need to put it on the new hard drive - don't do that yet, as you still need to clone everyting onto the new drive. |
|
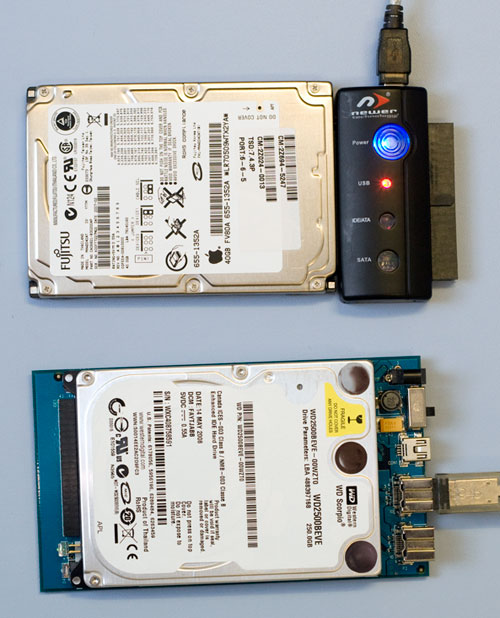
Take the drive you removed from your AppleTV and your new drive (a 250GB Western Digital Scorpio, in this photograph) and hook them up to your computer that you are going to clone them with.
You have a multitude of options here; in this photograph a Newer Technology Universal Drive Adapter is hooked up to the original 40GB AppleTV (Fujitsu) hard drive and is connected via USB 2.0.
The new drive (the Western Digital Scorpio) is hooked to an OWC Mercury On-The-Go FireWire 800/USB 2.0 bridge card, not installed in it's clear acrylic case. Both are sitting on an anti-static mat (Be sure to observe static-safe precautions).
You of course, can use any drive enclosure or adapters that you have, that support 2.5" PATA hard drives, it's your choice. |
|
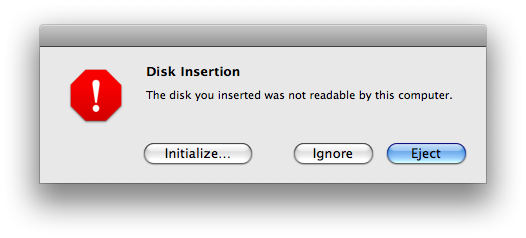
On your computer, the first thing you will see when you hook up the two drives is this box pop up, since your new drive is not initialized. Click Ignore.
The second thing you will see is that two hard drive volumes have appeared on the desktop; OSMedia and Boot. Ignore them for now. |
|
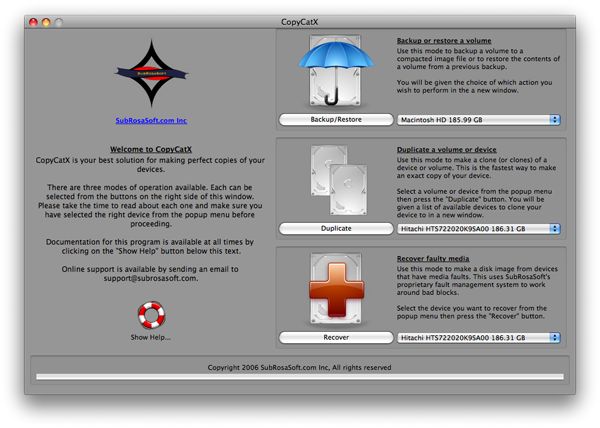
Open SubRosaSoft's CopyCatX |
 |
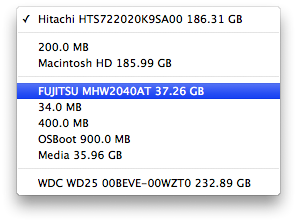
| Click the pulldown menu to the right of the "Duplicate" button. |
|
| The volume you want to duplicate is the FUJITSU MHW2040AT 37.26 GB volume (Or, if you have a 160GB AppleTV, select that drive mechanism). |
|
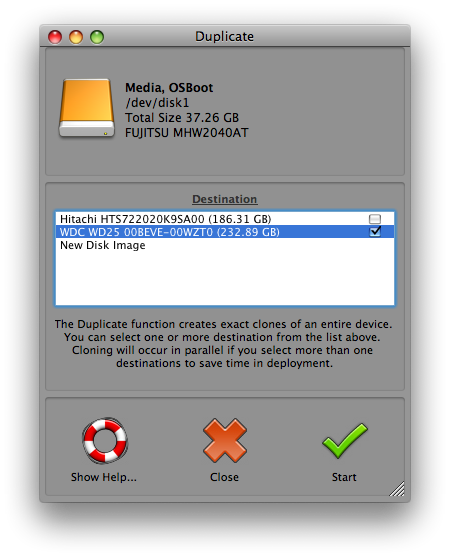
Once you select the drive you want to clone, this dialog box appears.
Click Start. |
|
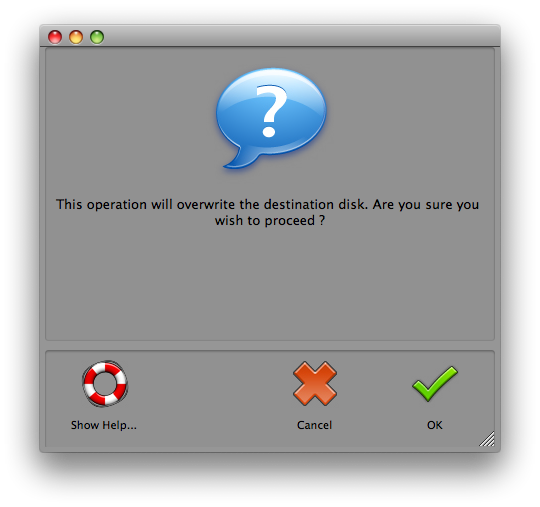
| Click OK. |
|
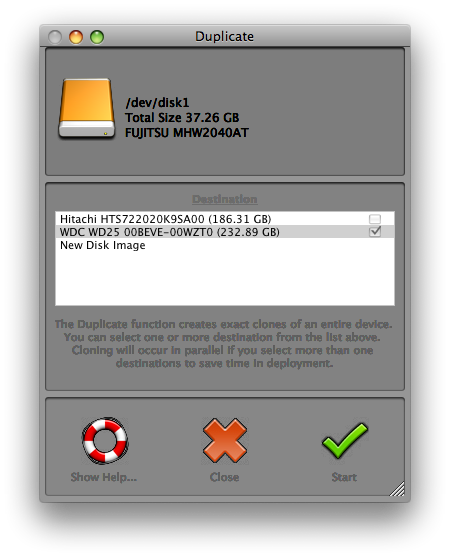
Wait about 45 minutes for the duplication to complete. Here you can see you are copying from the original AppleTV drive (37.26GB) to the 250GB Western Digital (232.89GB).
Once complete, quit the program and dismount/disconnect the AppleTV drive. You may want to just shut the computer down and then disconnect to make sure you have dismounted the correct volume, since both have the same name now on the desktop. Better to be safe than sorry. |
|
| Launch SubrosaSoft's VolumeWorks application. |
 |
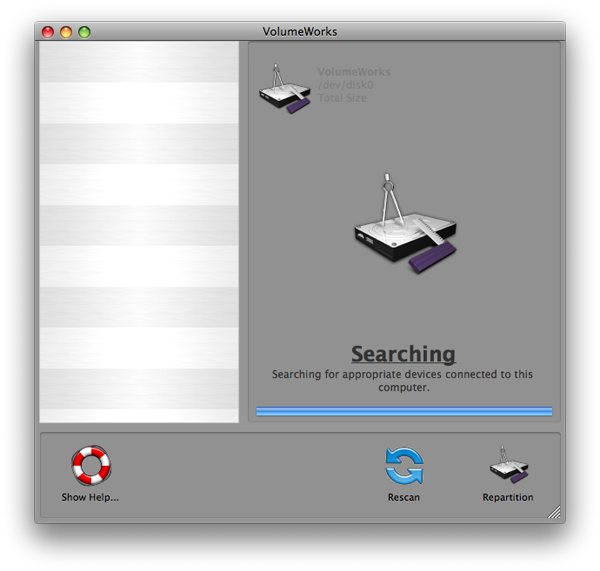
| This screen will appear when you launch VolumeWorks. Don't be alarmed, it takes about a minute to query the drives mounted to your computer. |
|
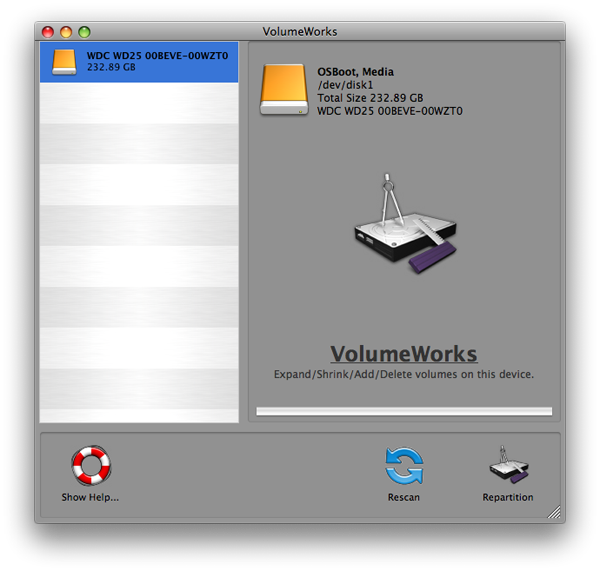
| Here you can see that VolumeWorks has discovered the 250GB Western Digital drive and is ready to repartition it. Click on the Repartition button in the bottom right of the screen. |
|
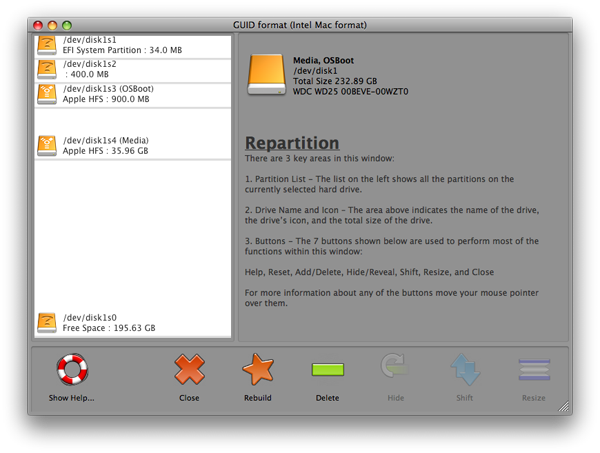
The Repartition screen shows the structure of the hard drive. The important parts to notice here are
-
The (Media) volume is 35.96GB in size - mirroring the original AppleTV 40GB hard drive partition size
-
There is 195.63GB of free space at the end of the drive - you need to resize the volume to reclaim that unused space and add it to the Media volume.
|
 |
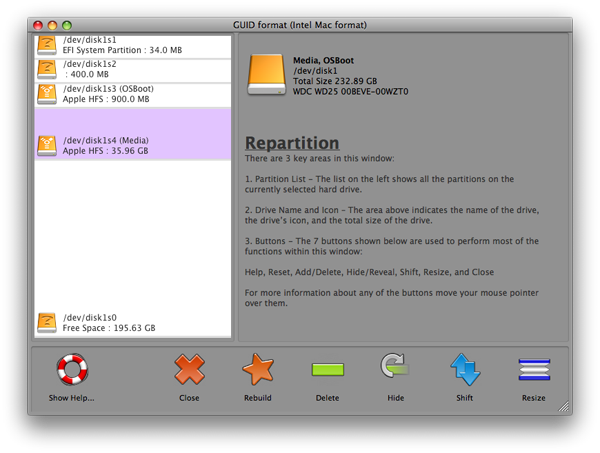
| Click on the Media partition, and click on Resize in the bottom right of the window. |
 |
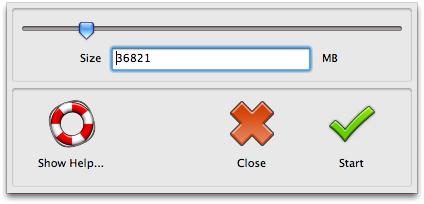
| This info box will pop up, showing how much space you can expand to - grab the scroll button and move it all the way to the right. Click on Start. |
 |
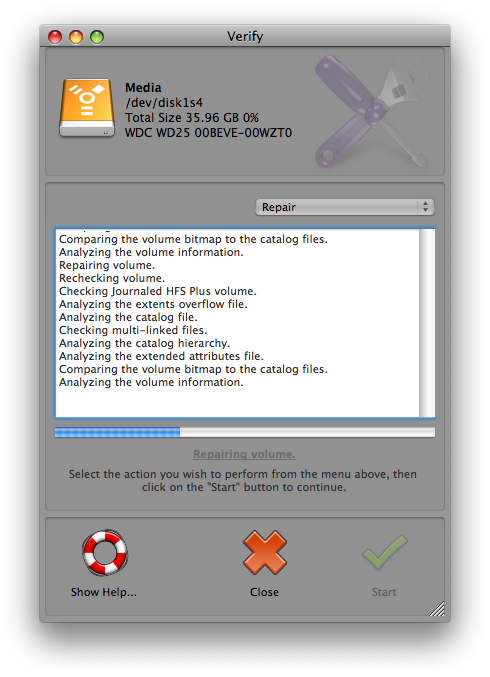
| You will see a number of windows open up, showing the status of the resize. |
 |
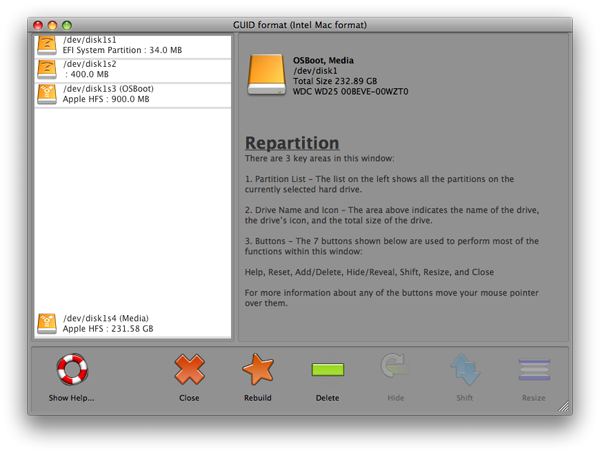
| Here you can see the end result; the Free Space is eliminated, and the (Media) partition now has 231.58GB of space available. |
 |
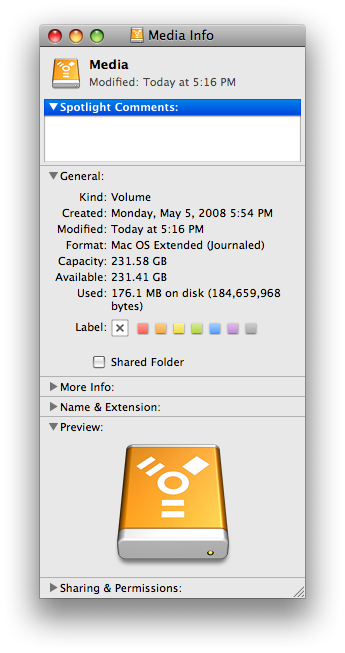
| And finally, if you get info on the Media volume, you can see the same result - 231GB of free space for movies on your AppleTV! |
 |
Disconnect the hard drive from your computer.
Go back up to the take apart section, and you can now install the 250GB Western Digital into the AppleTV.
- Plug the ATA cable into the hard drive. The 4 end pins are not used, the cable does not cover them.
- Place the sticky green pad on the bottom of the drive, set it in the bottom metal cover of the AppleTV, and partially start one of the hard drive screws. Get all 4 lined up and started before tightening, then you can tighten all of them.
- Place the bottom back onto the AppleTV and replace the 4 screws - 2 short near the rear ports, two long at the front, as in the picture at the top of this article.
- Replace the rubber foot on the bottom of the AppleTV. You should easily be able to get it to stick back in place, it has more than enough adhesive on it.
- Hook the AppleTV up to your TV and start it up.
Once your AppleTV boots, it MAY go into "recover" mode - if so, let it run - it will reboot into the AppleTV OS when complete.
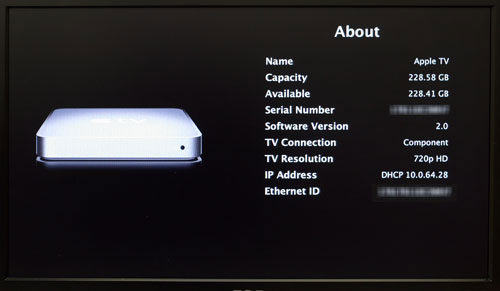
Once it's booted, you should see this in your "About this AppleTV" screen.
|
Congratulations, you have successfully upgraded the hard drive in your AppleTV! |
|
|


 1-800-275-4576